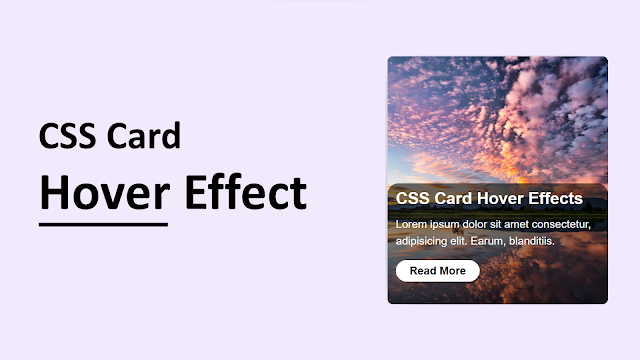
Credit :
Background Image :
Photo by James Wheeler: https://www.pexels.com/photo/symmetrical-photography-of-clouds-covered-blue-sky-1486974/- Image.
- Title.
- Description.
- Button (Read More button).
Video Tutorial on CSS Card Hover Effects Using HTML & CSS.
CSS card hover with effect
- index.html
- index.css
Step 1: Create basic structure.
HTML
<!DOCTYPE html>
<html lang="en">
<head>
    <meta charset="UTF-8">
    <meta http-equiv="X-UA-Compatible" content="IE=edge">
    <meta name="viewport" content="width=device-width, initial-scale=1.0">
    <title>Document</title>
    <link rel="stylesheet" href="index.css">
</head>
<body>


</body>
</html>
CSS
*{
    padding: 0px;
    margin: 0px;
    font-family: sans-serif;
}
body{
    width: 100%;
    height: 100vh;
    background-color: #f4ebff;
    display: flex;
    align-items: center;
    justify-content: center;
}
Output:
Step 2: Create the card and add image.
Make one box and add image in it. Here card is div tag with class value box(class='box').
HTML
    <div class="box">
        <div class="thumbnail">
            <a href="#"><img src="image/image.jpg"></a>
        </div>

    </div>
CSS
.box{
    width: 400px;
    height: 450px;
    background-color: #000;
    border-radius: 10px;
    box-shadow: 0px 5px 50px -30px rgb(0 0 0);
    overflow: hidden;
    position: relative;
}
.box .thumbnail , .box .thumbnail a img{
    width: 100%;
    height: 100%;
}
Output:
Step 3: Add title, description and button.
Now after image, lets add title, description and button below the image (class="thumbnail").
This all wrap in one div which I given class value title_and _description which position is set to absolute and bottom 0px and card which we created above is set to position relative. So, this title_and _description place on card at the bottom.
HTML
        <div class="title_and_description">
            <h1><a href="#">CSS Card Hover Effects</a></h1>
            <div class="description">
                <p>Lorem ipsum dolor sit amet consectetur, adipisicing elit. Earum, blanditiis.</p>
                <button type="button"><a href="#">Read More</a></button>
            </div>
        </div>
CSS
.box .title_and_description{
    position: absolute;
    bottom: 0px;
    background: linear-gradient(180deg , #00000091 , #00000040);
    padding: 10px 15px;
    transition: 0.3s;
}
.box .title_and_description h1{
    font-size: 30px;
}
.box .title_and_description h1 a{
    color: #fff;
    text-decoration: none;
    display: block;
}
.box .title_and_description h1 a:hover{
    text-decoration: underline;
    text-underline-position: under;
}
.title_and_description .description{
    font-size: 20px;
    color: #fff;
    line-height: 1.5;
    height: 150px;
    margin-top: 15px;
    transition: 0.3s;
}

.title_and_description .description button{
    font-size: 20px;
    margin-top: 20px;
    background-color: #fff;
    border: none;
    border-radius: 40px;

}
.title_and_description .description button a{
    font-weight: bold;
    color: #000;
    text-decoration: none;
    padding: 8px 25px;
    display: block;
}
Output:
Now let’s hide the description. So, to hide it we just make height 0px and overflow hidden to description class(class=’description’).
CSS
.title_and_description .description{
    font-size: 20px;
    color: #fff;
    line-height: 1.5;
    height: 0px;
    overflow: hidden;
    margin-top: 15px;
    transition: 0.3s;
}
Output:
Step 4: Show the description on hover.
So now let’s make the description visible when user hover on card.
Here the card is div tag with class value box(class=’box’). So, when user hover on it we make the description height:150px so that it can visible. See the below css code.
CSS
.box:hover .description{
    height: 150px;
}
.box:hover .title_and_description{
    border-top-left-radius: 20px;
    border-top-right-radius: 20px;
}
So now when user hover on card the description height increases and it visible.
You may like:
- How to change button text on hover with sliding animation using HTML, CSS and JavaScript.
- How to create an animated navigation bar using HTML, CSS and JavaScript.
- How to create a buttons with simple CSS hover effects.
- Create a CSS button border hover effects.
- How to create a tool tip using HTML and CSS.
- How to create a button border animation using HTML and CSS on hover.
Final code:
So that’s how you can make css card with hover effects. If you have any question or suggestion you can write in comment section.


Share your thoughts.